Dive into the world of music production with Ableton Push, the versatile controller that has revolutionized the way artists create and perform music. This guide will take you through the essentials of getting started with Ableton Push, exploring advanced production techniques, optimizing your live performance, delving into creative sound design, and seamlessly integrating Push into your studio workflow. Whether you're a beginner or a seasoned producer, these insights will help you unlock the full potential of Ableton Push in your musical endeavors.
Key Takeaways
- Ableton Push provides an intuitive interface that fosters creativity, offering hands-on control over music production and live performance.
- Setting up your first session with Push involves understanding the scale modes, recording, looping, and effectively navigating the interface.
- Advanced techniques such as crafting complex drum patterns, automation, and incorporating external instruments can elevate your music production.
- Ableton Push excels in live performance settings with features for seamless clip launching, sound manipulation, and set transitioning.
- Integrating Push into your studio workflow can enhance efficiency and customization, while troubleshooting common issues ensures a smooth creative process.
Mastering the Basics of Ableton Push

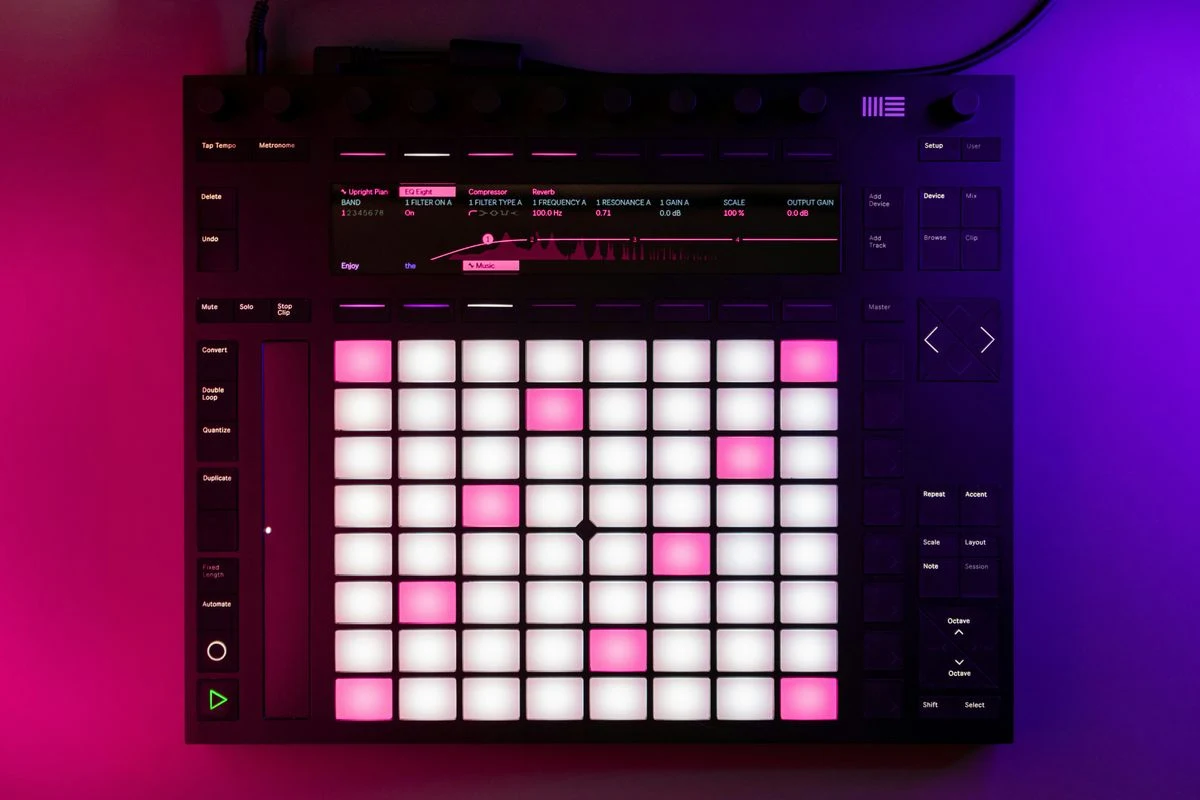
Understanding the Push Interface
The Ableton Push interface is a gateway to a myriad of musical possibilities. Navigating this interface efficiently is key to unlocking your creative potential. The layout is designed to be intuitive, with pads that can trigger clips, play notes, and manipulate sounds, all at your fingertips.
- The top section houses the display and encoder knobs for precise control over parameters.
- The middle section features the touch-sensitive pads, which are central to performance and composition.
- The bottom section contains additional controls for navigation and settings.
Familiarity with each section will streamline your workflow and allow you to focus on the music rather than the mechanics of the controller.
Setting Up Your First Session
Starting your journey with Ableton Push begins with setting up your first session. Ensure your audio interface is properly connected and that Ableton recognizes your inputs, whether you're recording with a mic, guitar, or other instruments. Familiarize yourself with the Session view, as it allows for intuitive note input and clip launching, setting the stage for a fluid workflow.
Creating a track is your next step. Verify your preferences in Ableton to make sure everything is configured correctly, then create a new track for recording. If you're using Reaper or another DAW, the process might involve shortcuts like Ctrl + T to add a new track to your project.
Running into trouble is part of the learning process. Be patient and utilize resources such as forums, support channels, and tutorials to resolve common issues like latency.
Remember, selecting the right DAW is crucial for your music production journey. Whether it's Ableton, Logic Pro X, or another, ensure it complements your workflow and enhances your creative process.
Navigating the Scale Modes
Ableton Push offers a variety of scale modes that can significantly enhance your melodic and harmonic creativity. Understanding and utilizing these scales is crucial for crafting compelling music. Here's a quick guide to help you navigate through them:
- To select a scale, hold the 'Scale' button and choose from the illuminated pads.
- The root note of the scale can be set by tapping a pad while the 'Scale' button is active.
- Push's pads will automatically update to show only the notes from the selected scale, making it easier to stay in key.
By mastering scale modes, you can avoid wrong notes and focus on the expression of your music.
Remember, experimenting with different scales can lead to new musical ideas and help you find your unique sound. The following table summarizes some essential shortcuts that can aid in your scale navigation:
| Function | Modifier(s) | Key |
|---|---|---|
| Increase Grid | Shift | = |
| Decrease Grid | Shift | - |
| Toggle Snap To Grid | Shift | \ |
| Align Grid | Option+Command | I |
As you become more familiar with these functions, you'll find that switching between scales and creating music becomes a more fluid and intuitive process.
Recording and Looping Techniques
Ableton Push offers a seamless experience for recording and looping, essential for both studio production and live performance. Setting up for a perfect take is straightforward with the right-click options on the transport area's record button. Selecting 'Record Mode: Time selection auto-punch' combined with pre-roll settings ensures that you can loop a section for multiple takes without hiccups, regardless of your performance on that day.
To further refine your looping workflow, consider the following settings:
- Update Playback > At Next Bar: Ensures playback continues to the end of the next bar before restarting the loop.
- Update Playback > At Loop End: Playback continues to the end of the previously defined loop before restarting.
- Loop Ruler > Update Loop: Use Command+L (or the equivalent shortcut for your OS) to quickly set your loop region.
Experimenting with these settings will help you find the perfect balance for your looping needs, whether you're laying down a rhythm section or creating ambient textures.
Remember, the blue button next to the record button toggles looping on and off, making it easy to manage your loops during a session. For live performance, setting up drum racks and utilizing suggested parameters can greatly enhance your control over loops, allowing for dynamic and engaging sets.
Advanced Music Production Techniques

Crafting Complex Drum Patterns
Ableton Push offers an intuitive pathway to craft complex drum patterns that can elevate your music production to new heights. To create beats using Push 2, first ensure that Note Mode is enabled, then use Browse Mode to navigate to the Drums section. This initial step is crucial for laying down the foundation of your rhythm.
- Start by selecting your drum rack and loading your desired samples.
- Experiment with layering different sounds, such as kicks, snares, and hi-hats, to add depth.
- Utilize the step sequencer to place beats precisely or record in real-time for a more organic feel.
- Adjust velocity and apply swing to give your pattern a more human touch.
With Ableton's vast library of sounds and the easy snap feature, you can drag and drop beats to build your track effortlessly. Remember to explore the free sound packs available for even more sonic possibilities.
Advanced techniques involve designing custom drum sounds and utilizing macros to manipulate parameters for dynamic control. Dive into the frontier of sound design by building a specialized Kick Sound Design Rack, which can add a unique signature to your music.
Exploring the Power of Automation
Ableton Push's automation capabilities are a game-changer for music producers. Employ automation curves to smoothly transition between dynamics, creating a more expressive and dynamic mix. By automating synth parameters, you can achieve evolving textures that breathe life into your tracks.
Automation isn't just about volume and pan. Push allows you to draw in automation for filter cutoffs and reverb sends, adding movement and interest to your chords. This technique is particularly effective in electronic music, where subtle changes can have a profound impact on the overall sound.
Remember, the trim button on Push opens up a world of creative possibilities. Virtually everything in your Ableton Live set can be automated, offering you the flexibility to refine your music to perfection. Whether it's adjusting the timing of notes with the nudge feature or layering different sounds for added richness, automation is your ally in crafting a polished and professional sound.
Here are some tips to enhance your automation workflow with Push:
- Utilize keyboard shortcuts and macro controls for efficiency.
- Regularly review and refine your automation to ensure consistency.
- Stay proactive in learning new automation techniques and tools.
Embrace the power of automation with Ableton Push and transform your music production into a more nuanced and intricate art form.
Utilizing Audio and MIDI Effects
Ableton Push offers a tactile and intuitive way to apply and manipulate audio and MIDI effects, elevating your music production to new heights. Experiment with layering different sounds to create unique textures. For instance, combining a flute and piccolo can add an octave leap effect, enhancing the melody's richness and clarity.
Automation in MIDI is pivotal for breathing life into your compositions. You can automate virtually every aspect of your arrangement, from simple volume fades to complex modulations.
Understanding the full range of effects available in your DAW is crucial. Here's a simple list to get you started with Push:
- Apply reverb and delay for spatial depth
- Use compression and EQ to shape your sound
- Explore modulation effects like chorus and flanger
- Integrate distortion and saturation for warmth and grit
Remember, the key to mastering effects is not just in the selection but in the subtlety and intention behind their use. By utilizing the Push's hands-on controls, you can achieve precise adjustments and real-time manipulation, providing a more organic and expressive feel to your music.
Incorporating External Instruments
When you bring external instruments into your Ableton Push workflow, you're expanding your sonic palette and infusing your tracks with a unique character. Integrating outboard equipment with your DAW can be a transformative experience, allowing you to capture the warmth and richness of analog gear. High-quality converters and preamps are essential for ensuring that the audio from your instruments is accurately translated into the digital realm.
To achieve an authentic sound with virtual instruments, focus on the roles and ranges of natural orchestral sections. This approach will enhance the realism of your productions.
Incorporating external instruments involves more than just connecting hardware. You must also consider how to control and manipulate these instruments within your arrangements. Here's a simple guide to the types of instrument connections:
- Instrument: Connected directly to your audio interface
- Mic'd instrument: A mic connected to your audio interface
- Software-based instrument: Entirely inside your computer but optionally performed with a controller
Remember to integrate MIDI CC data to refine dynamic expression and articulation changes, which are crucial for a nuanced performance. Whether you're using a vintage synth or a modern drum machine, the key is to blend these elements seamlessly with your virtual instruments, creating a cohesive and expressive musical piece.
Live Performance Optimization

Seamless Clip Launching and Stopping
Ableton Push offers an intuitive approach to clip launching that can make live performances feel fluid and dynamic. To transition smoothly from recording to loop playback, simply press the clip's Launch button. This action ensures that your audience experiences no gaps or awkward silences between tracks. Stopping a clip is just as straightforward; you can press the Clip Stop button or the general Stop button to halt the audio immediately.
Mastering clip launching and stopping is crucial for maintaining the flow of your live set. It allows you to control the energy and pace, ensuring that each transition is as seamless as the music itself.
Here are some tips to optimize your clip launching and stopping workflow:
- Practice the timing of your button presses to match the rhythm of your performance.
- Utilize the quantization features to ensure clips launch in time with the beat.
- Familiarize yourself with the color coding of the Push's pads, which indicate the state of each clip.
- Develop muscle memory for the layout of the Push, so you can focus on the music rather than searching for controls.
Transitioning Between Live Sets
Transitioning smoothly between live sets is crucial for maintaining the flow of your performance. Ableton Push makes this process seamless with its intuitive layout and quick access controls. To ensure a smooth transition, follow these steps:
- Prepare your live sets in advance, making sure they are well organized and labeled.
- Practice the transition process to build muscle memory and confidence.
- Use the 'Session View' to launch clips and scenes that bridge your sets together.
- Map out any necessary controls on Push for quick access during the transition.
Remember, the key to a flawless set transition is preparation and familiarity with your equipment. Take the time to rehearse transitions to avoid any hiccups during your live performance.
According to the Live Concepts section in the Ableton Reference Manual Version 12, if you're using two windows, pressing [Tab] will swap the Session and Arrangement from one window to the other. This can be a handy feature when you're looking to transition between different phases of your set without interrupting the flow.
Manipulating Sounds in Real-Time
Ableton's Push controller offers a tactile experience, allowing for real-time manipulation of sounds during live performances. This hands-on control extends to dynamic processing, where you can apply effects like reverb, compression, and frequency shifting on the fly, shaping the sonic landscape as you go.
By utilizing the Push's encoders and touch-sensitive pads, you can interact with your music in a more intuitive and expressive way, tweaking parameters to achieve the perfect sound.
Here's a quick guide to real-time sound manipulation with Ableton Push:
- Experiment with automation: Record movements of knobs and faders to add movement to your tracks.
- Layer effects: Combine multiple effects to create complex soundscapes.
- Manipulate samples: Use the Push to chop and loop samples, altering their pitch and timbre.
- Control spatial sound: Place elements in the stereo field for an immersive experience.
Remember, the key to effective sound manipulation is an in-depth understanding of the parameters at your disposal. This knowledge allows you to transform established sounds into something uniquely yours.
Using Ableton Push in a Band Setup
Integrating Ableton Push into a band setup can transform your live performances, offering new dimensions of interactivity and control. When each member of the band is familiar with the Push interface, it can serve as a central hub for triggering samples, loops, and effects that complement the live instruments.
- Communication is key; ensure all band members are aware of the Push's role in the performance.
- Assign specific controls to different members for efficient management.
- Practice extensively to synchronize the Push's capabilities with the band's dynamics.
The Push's versatility allows for on-the-fly adjustments and improvisation, making it an invaluable tool for live music creation.
Remember, the goal is to enhance the live sound without overshadowing the traditional elements of the band. It's about finding the right balance between electronic and acoustic sounds to create a cohesive and engaging live experience.
Creative Sound Design with Ableton Push

Experimenting with Sampling and Slicing
Sampling and slicing are pivotal techniques in modern music production, allowing producers to infuse their tracks with unique textures and rhythms. Sampling involves capturing audio snippets to be repurposed creatively, often by pitching, stretching, or mangling the sample. This is particularly essential in genres like hip-hop and electronic music.
When it comes to slicing, Ableton's Simpler is a powerful tool that enables you to split a sample into multiple segments. These segments can then be triggered individually, offering a new dimension of creativity. For instance, once your sample has been split, you can create a new MIDI region by double-clicking on your track in the arrangement view and drawing the MIDI pattern you desire.
An in-depth understanding of slicing parameters can dramatically alter your sound's character. By mastering chopping, looping, layering, and applying effects, you can transform established sounds into something entirely unique.
Here are some key parameters to explore within Ableton's Simpler when slicing samples:
- Slice: Determines the individual segments of the sample.
- Zone: Assigns different slices to specific keys or ranges.
- Key: Sets the root note for the sample slices.
- Velocity: Controls the dynamic response of the slices.
- Filter: Shapes the tonal quality of each slice.
- Amplitude: Adjusts the volume envelope for the slices.
- Envelope: Modifies the attack, decay, sustain, and release of the slices.
- LFO: Adds modulation to create movement within the slices.
- Modulation: Offers additional control over pitch, filter, and other parameters.
- Shaper: Introduces distortion or other effects to the slices.
- Voices: Sets the number of simultaneous slices that can be played.
- Polyphony: Determines how many notes can be played at once, affecting the complexity of the patterns you can create.
Designing Unique Audio Effects
Ableton Push offers a vast landscape for designing unique audio effects that can set your music apart. By delving into the world of synthesis and sampling, you can manipulate sound in ways that transform the familiar into the extraordinary.
- Experiment with convolution reverb to create space and atmosphere that's truly your own.
- Use frequency shifting to add a unique twist to your sounds.
- Explore Max for Live devices for endless possibilities in sound manipulation.
The true power of Ableton Push in sound design lies in its ability to encourage fearless experimentation. With its hands-on controls, you can tweak, morph, and sculpt sounds on the fly, giving you instant auditory feedback that fuels creativity.
Remember, the key to mastering unique audio effects is understanding the interplay between different parameters. Whether you're layering samples or connecting oscillators and filters in modular environments, each adjustment can lead to a new discovery. Embrace the process of exploration and let Ableton Push be your guide to uncharted sonic territories.
Harnessing the Potential of MPE
MIDI Polyphonic Expression (MPE) is a game-changer for sound designers using Ableton Push. It allows for individual note expression, giving you the ability to modulate parameters like pitch, timbre, and volume per note. This level of control can lead to more expressive and dynamic performances.
- Understand the MPE-compatible instruments in Ableton Live
- Assign MPE controls to Push's encoders for real-time manipulation
- Experiment with the range of expression on each pad
By carefully mapping out your MPE controls, you can create a setup that feels intuitive and responsive to your touch.
Various platforms offer free and premium music production courses, resources, and expert guidance to help beginners and aspiring producers enhance their skills and creativity in electronic music production. This is especially useful when delving into the complexities of MPE, as it can be a steep learning curve for those new to the concept.
Building Textures with Granular Synthesis
Granular synthesis is a technique that can transform the mundane into the extraordinary. By dissecting audio samples into tiny grains, it allows producers to create complex soundscapes that are rich in texture. Ableton Push users can harness this power through devices like Granulator II, a Max for Live tool that excels in this domain.
Granular synthesis is not just about the end result; it's a journey through sound manipulation. Exploring its parameters—such as grain size, density, pitch, and pan—can lead to unexpected and inspiring sonic discoveries.
Here are some key parameters to experiment with in Granulator II:
- Grain Size: Determines the length of each grain.
- Density: Controls the number of grains played simultaneously.
- Pitch: Adjusts the pitch of the grains.
- Pan: Sets the stereo position of each grain.
Understanding and tweaking these parameters can lead to a vast array of sound textures, from ethereal pads to rhythmic patterns. The ability to time stretch, scan, and modulate samples opens up a world of creative possibilities, encouraging producers to think outside the conventional boundaries of sound design.
Integrating Ableton Push into Your Studio Workflow

Optimizing Your Setup for Efficiency
Efficiency in music production is paramount, and optimizing your Ableton Push setup is a key step in achieving a smooth workflow. Establish a standardized project template in your DAW to significantly reduce the setup time for each new project. This template should include your preferred track layouts, default effects, and any MIDI mappings that you regularly use.
Personalization is crucial for a streamlined process. Consider the following tips to tailor your setup:
- Configure key commands for frequently used actions.
- Create templates for different types of projects.
- Utilize dedicated hardware for tactile control.
- Make use of customizable views and controls.
Utilize keyboard shortcuts and macro controls to expedite routine tasks. Regularly revisiting and refining your process can lead to significant time savings and ensure that your attention to detail remains sharp.
Remember, the goal is to minimize distractions and enable you to focus on the creative aspects of music production. By optimizing your setup, you can ensure that your studio environment is conducive to both creativity and productivity.
Synchronizing with Other Hardware
When integrating Ableton Push into your studio setup, synchronizing with other hardware is crucial for a cohesive workflow. Ableton Link is a powerful tool that allows you to sync DAWs and apps to play in time effortlessly. To use Ableton Link, simply join the same local network, show the Link button in Live, select Link as a clock source, activate it, and enable start/stop synchronization.
High-quality converters and preamps are essential when incorporating outboard equipment like reverbs or equalizers. They ensure that your external hardware integrates seamlessly with your DAW, providing optimal performance and sound fidelity. Here's a quick checklist to ensure proper synchronization:
- Double-check that all hardware is connected and powered correctly.
- Calibrate levels and verify driver compatibility.
- Restart your DAW and/or computer if necessary.
Remember, the integration of analog gear such as synthesizers and compressors can add a warm, rich sonic texture to your digital recordings, making the synchronization process well worth the effort.
Customizing Push for Your Production Style
Ableton Push offers a level of customization that can significantly enhance your music production workflow. Configuring key commands for frequently used actions is a fundamental step in tailoring the Push to fit your style. By doing so, you can access your most-used features quickly, without breaking your creative flow.
Creating templates for different types of projects can streamline your setup process. Whether you're working on a beat, a full track, or a live set, having a ready-to-go template means you can jump straight into the creative process.
The integration of Ableton Live with Push hardware takes your hands-on control to the next level, allowing for a more intuitive and productive experience.
Here's a list of personalization tips to consider:
- Utilize dedicated hardware for tactile control with Ableton Live.
- Make use of customizable views and controls in your DAW.
- Optimize sets for live gigs with performance tips for a seamless experience.
- Synchronize your Push with other studio hardware to expand its capabilities.
Troubleshooting Common Issues
When integrating Ableton Push into your studio workflow, encountering issues is a natural part of the process. Being prepared to troubleshoot can save valuable time and frustration. Here are some common problems and their potential solutions:
- Unresponsive Push: Ensure it's properly connected and recognized by your computer. Restarting both Push and Ableton Live can often resolve this.
- Audio glitches: Check CPU load and buffer size. Increasing the buffer size may help.
- MIDI sync issues: Verify MIDI settings and ensure that there are no conflicts with other connected devices.
- Button or pad sensitivity: Calibrate the sensitivity settings within Ableton Live to match your playing style.
Remember, most issues have simple fixes, but understanding the root cause is key to preventing them in the future.
If problems persist, consulting the Ableton Push user manual or seeking help from the Ableton community can provide additional insights. Keeping your software and firmware up to date is also crucial for optimal performance and minimizing issues.
Conclusion
As we've journeyed through the intricacies of music production with Ableton Push, it's clear that this powerful tool opens up a world of creative possibilities. From laying down your first beat to mastering live performances, the Push offers an intuitive and immersive experience that can elevate your music to new heights. Whether you're a beginner or an experienced producer, the tips and techniques discussed in this article, along with the wealth of tutorials and courses available, provide a solid foundation for you to explore and expand your skills. Remember, the key to using Ableton Push effectively is practice, experimentation, and a passion for music. So, dive in, get hands-on, and let your creativity flow through the Push's pads and knobs as you craft your unique sound.
Frequently Asked Questions
What are the basic features of Ableton Push that I should learn first?
Start by familiarizing yourself with the Push interface, setting up your first session, navigating scale modes, and mastering recording and looping techniques.
How can I create complex drum patterns with Ableton Push?
Use the step sequencer and adjust parameters like swing and velocity to craft complex drum patterns. Experiment with different drum racks and the repeat function for variations.
What are some advanced automation techniques in Ableton Push?
Explore automation by recording real-time parameter changes, using automation envelopes, and assigning macros to control multiple parameters simultaneously.
Can I use Ableton Push for live performances?
Yes, Push is designed for live performance with features like seamless clip launching, stopping, real-time sound manipulation, and transitioning between live sets.
How can I integrate external instruments with Ableton Push?
Connect your external instruments via MIDI or audio inputs, and use Push to control and sequence them alongside your Ableton Live tracks.
What should I do if I encounter issues with my Ableton Push?
Consult the troubleshooting section in the Push manual, check for firmware updates, and ensure your connections and software settings are correct. Contact Ableton support for further assistance.